Track web chat events in Google Analytics (GA4) using Tag Manager (GTM)
The web chat widget emits events that can be tracked in Google Analytics, useful for measuring website engagement and attributing web chat interactions to your marketing efforts like organic, social, or ads.
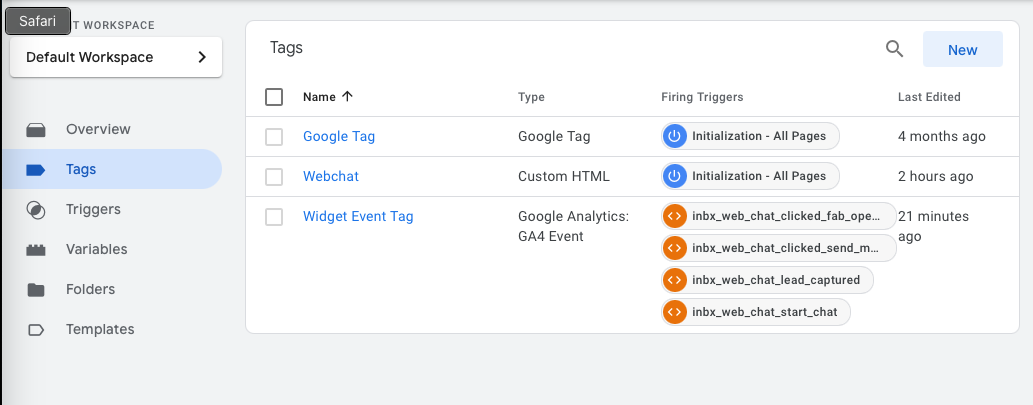
Trackable events include:
- When a user clicks the FAB to open or close the web chat widget
- When a new conversation is started
- When a user clicks the Send button to send a message
- When a new lead is captured
- When a meeting time is chosen
This document show the steps to add a web chat widget to a website and track events from the widget with Google Analytics.
This guide assumes you have a Google Analytics account and Google Tag Manager installed on your site. See Set up Google Tag Manager if you haven't done this yet.
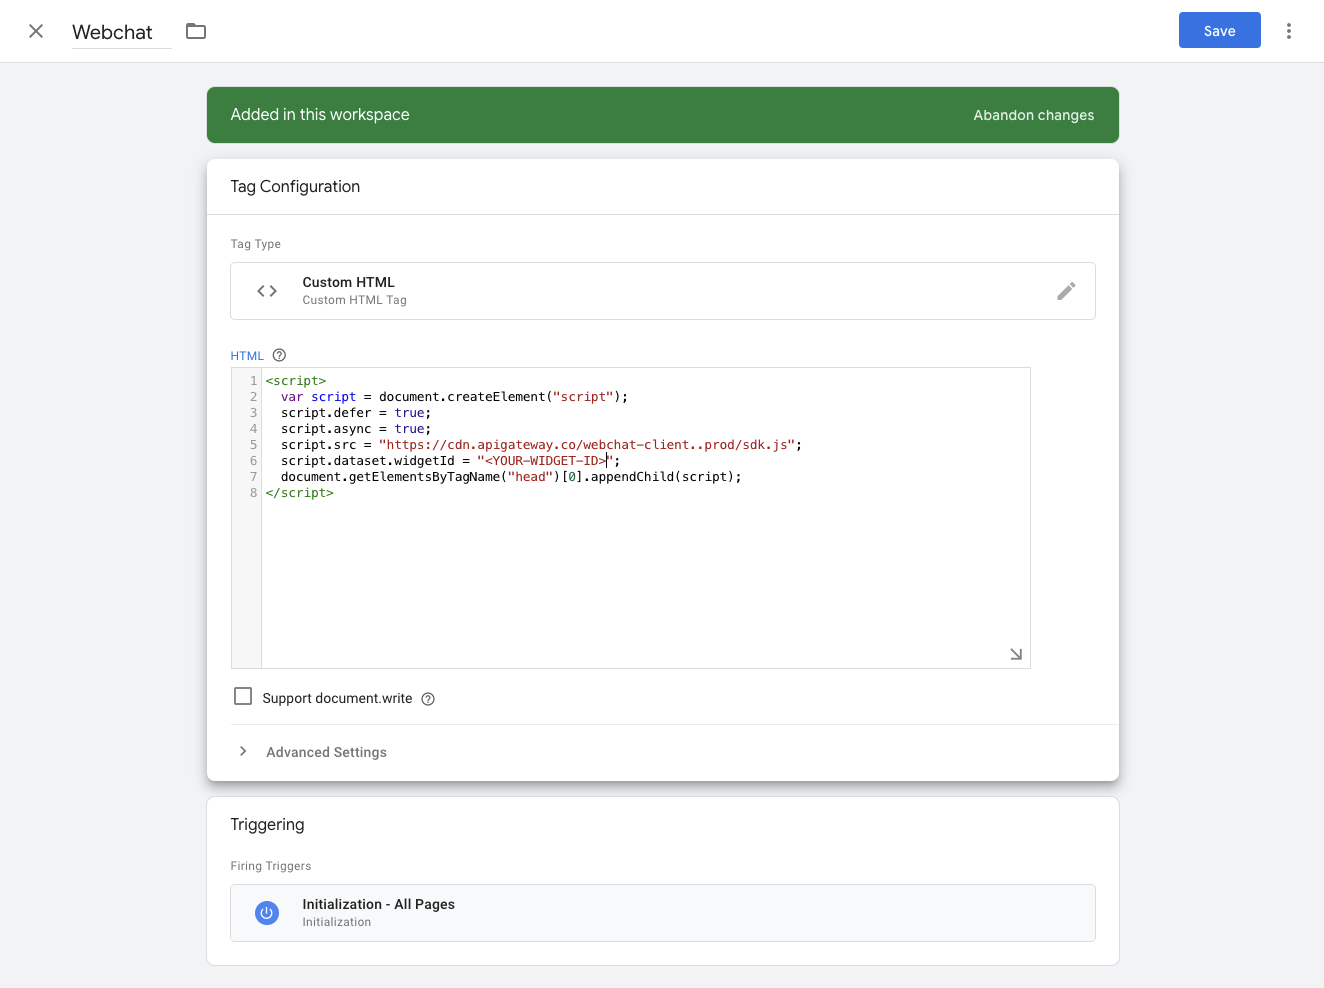
1. Install the web chat via Google Tag Manager
In Google Tag Manager, under Tags, add a new Custom HTML tag that includes the web chat widget script. The script is located in your web chat configuration in Partner Center or Business App.
Set the trigger to Initialization - All Pages so the widget loads on every page of the site.
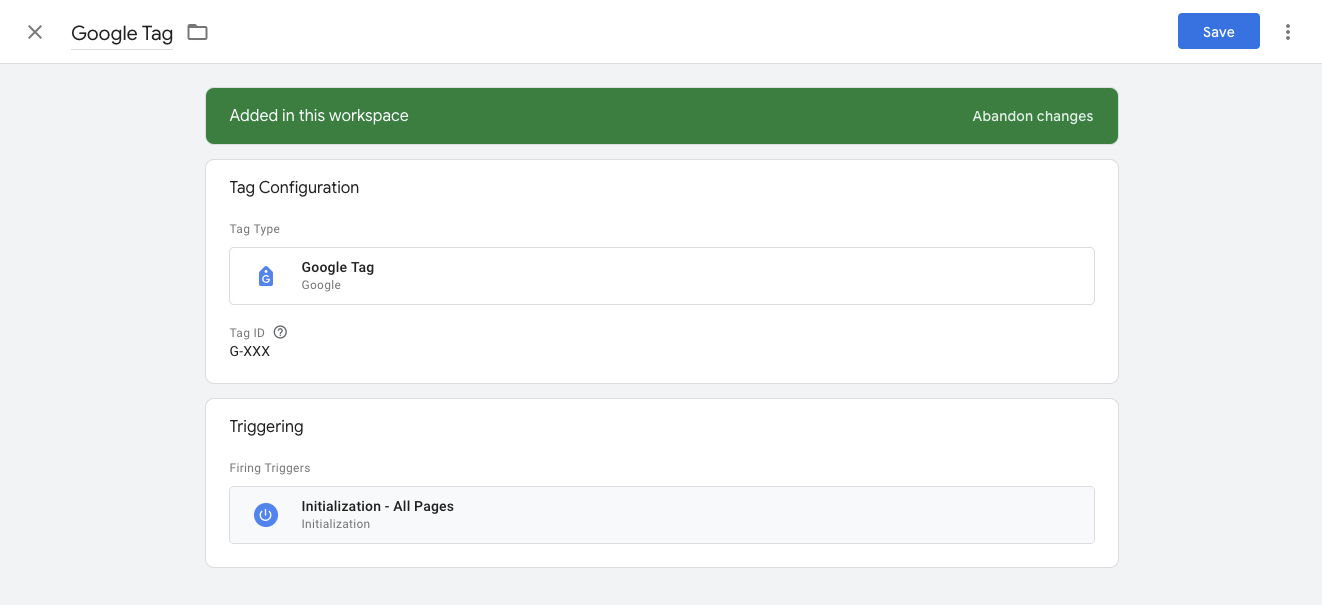
2. Install Google Analytics with Tag Manager
In Google Tag Manager, under Tags, add a new tag with the following settings:
- Tag configuration: Google Analytics → Google Tag
- Tag ID: Your Google Analytics container ID (found in the Google Analytics dashboard)
- Triggering: Initialization - All Pages
3. Add triggers
The web chat widget emits events when visitor actions occur. Use GTM triggers to forward these events to Google Analytics.
Event types
| Event name | Event key | Description |
|---|---|---|
| Start web chat | inbx_web_chat_start_chat | Emits when a new conversation starts with a visitor |
| Lead captured | inbx_web_chat_lead_captured | Emits when a lead is captured by the web chat |
| Send message | inbx_web_chat_clicked_send_message | Emits when a message is sent by a visitor |
| Open/close FAB | inbx_web_chat_clicked_fab_openclose_widget | Emits when the chat window is opened or closed by a visitor |
| Appointment time selected | inbx_web_chat_clicked_appointment_time | Emits when an appointment time is selected by a visitor (Neighborly only) |
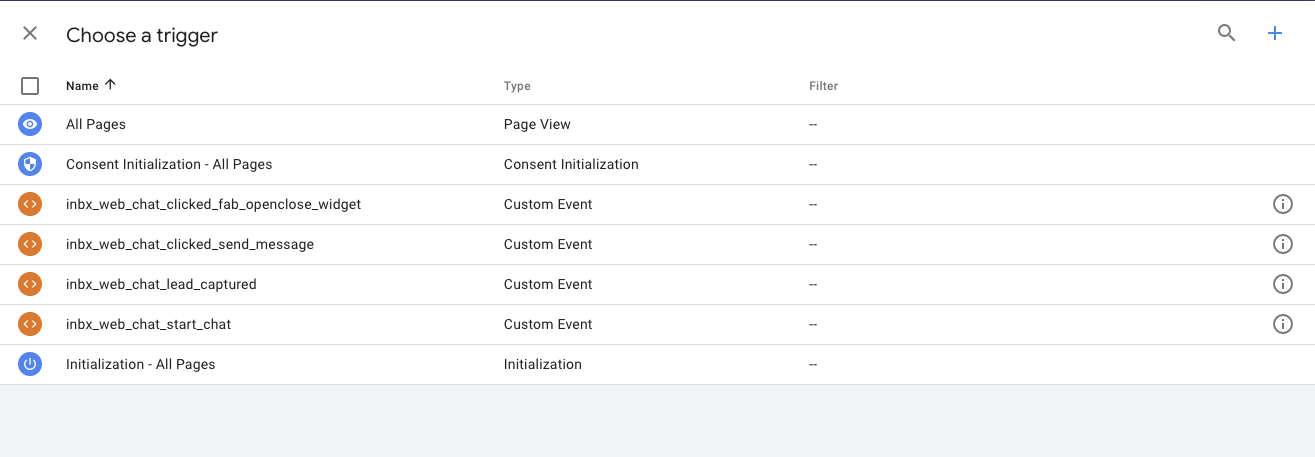
In Google Tag Manager, go to the Triggers tab and add a new trigger for each event you want to track:
- Trigger type: Custom Event
- Event name: The event key from the table above
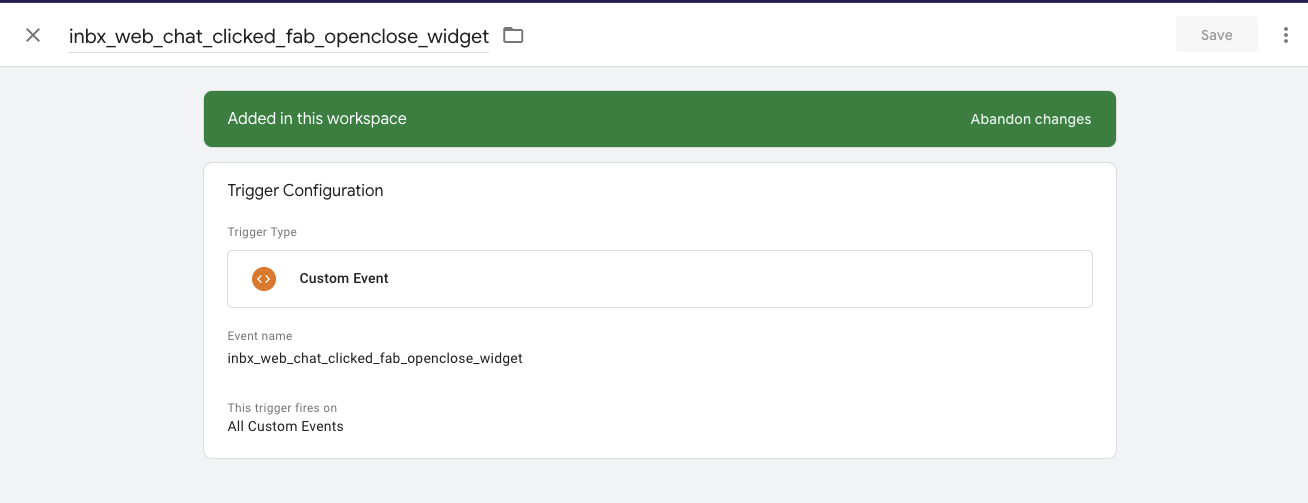
Add a trigger for each event you want to track. Your triggers list should look similar to:

4. Track web chat events
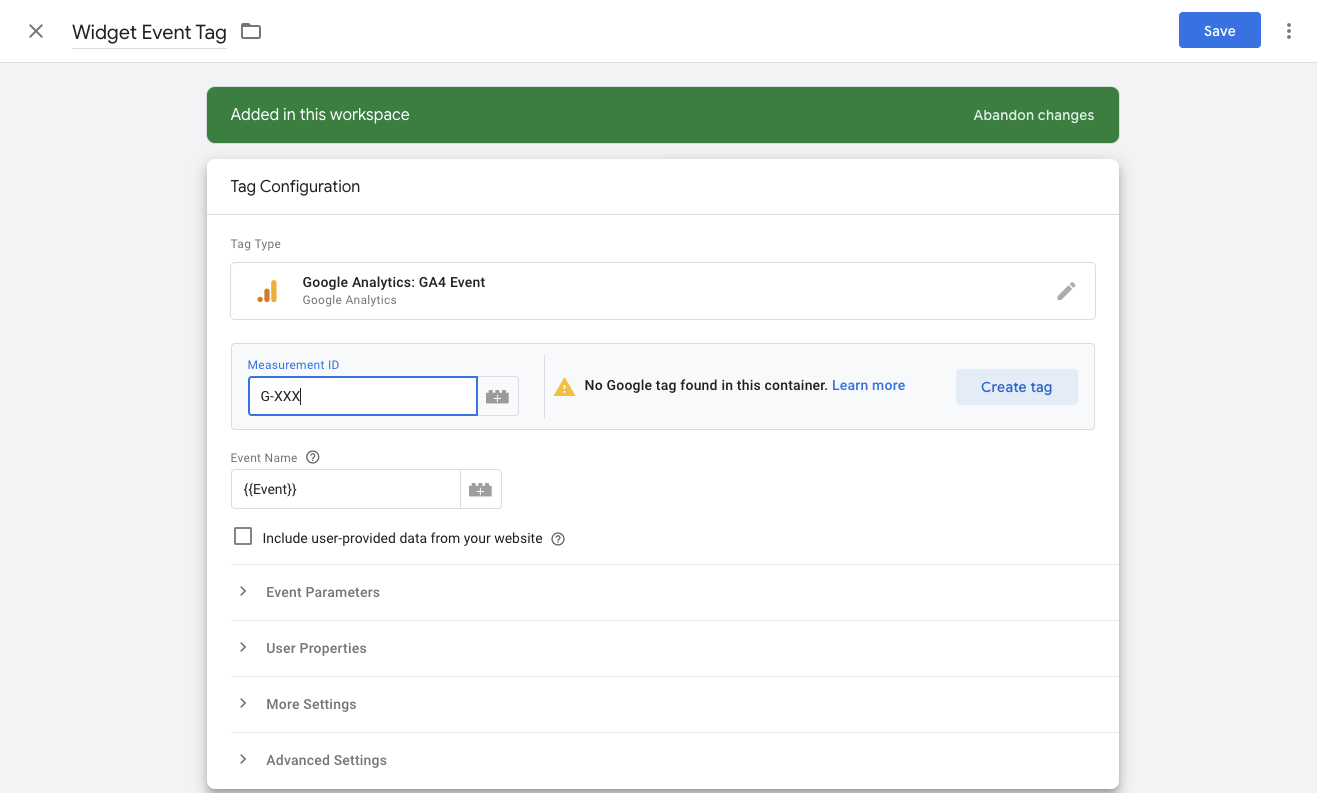
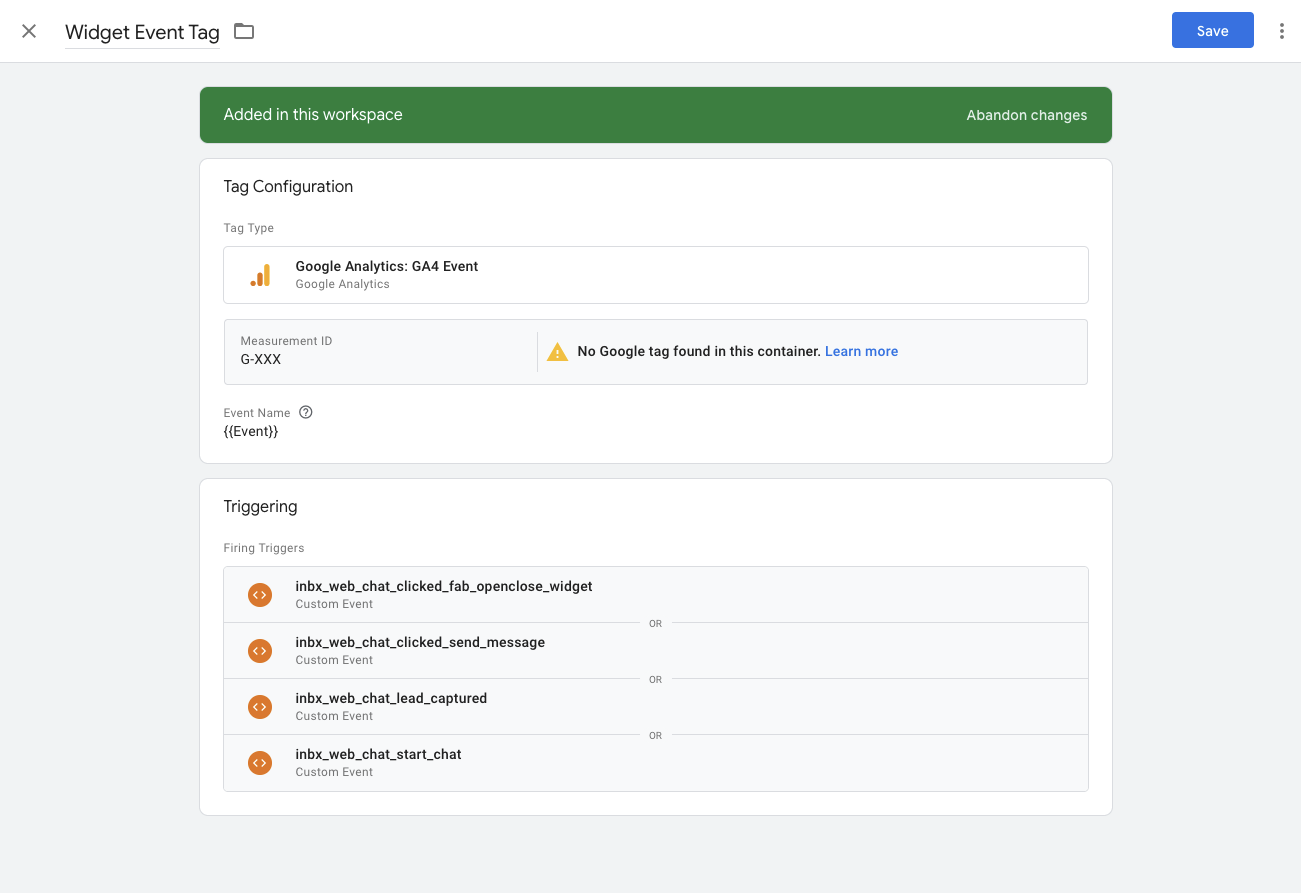
Add one final tag to send the trigger events to Google Analytics. Go to the Tags tab and add a new tag.
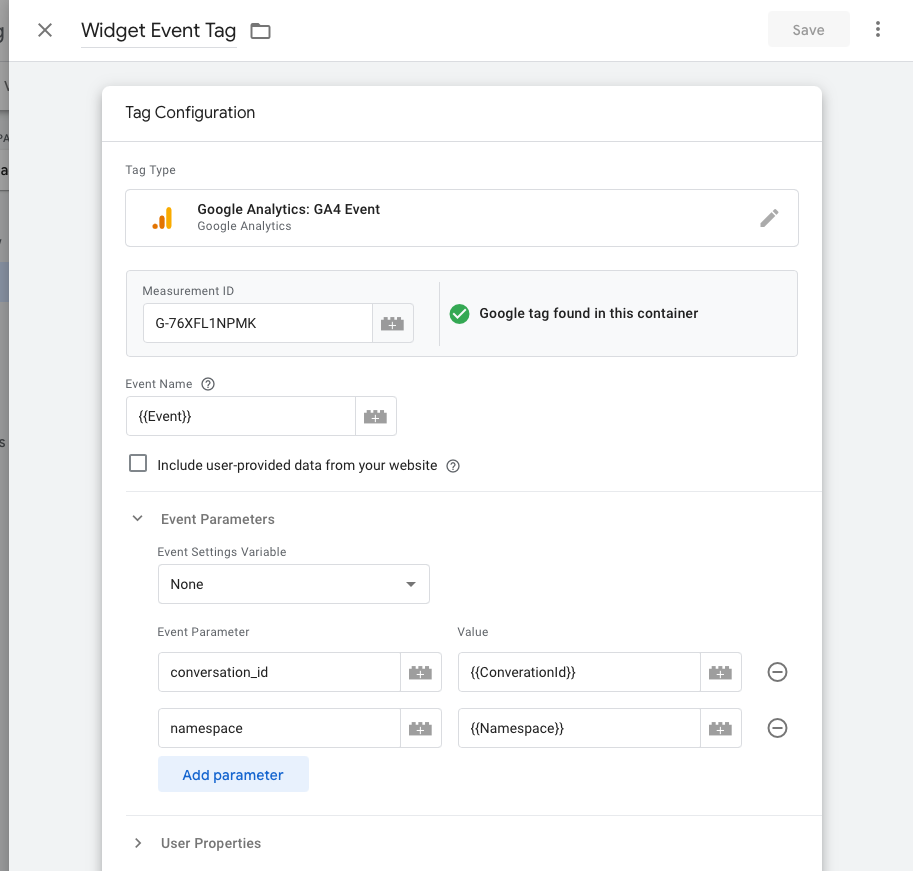
Tag configuration
- Tag type: Google Analytics → Google Analytics: GA4 Event
- Measurement ID: Same ID used for your Google Analytics tag in step 2
- Event name: Set to
{{Event}}— this dynamically uses the trigger event name
Triggering
Below the tag configuration, add the triggers created in step 3. You'll see the full list of triggers available to select.
Add all triggers you want this event tag to fire on. Your final configuration should look like:
Track additional variables
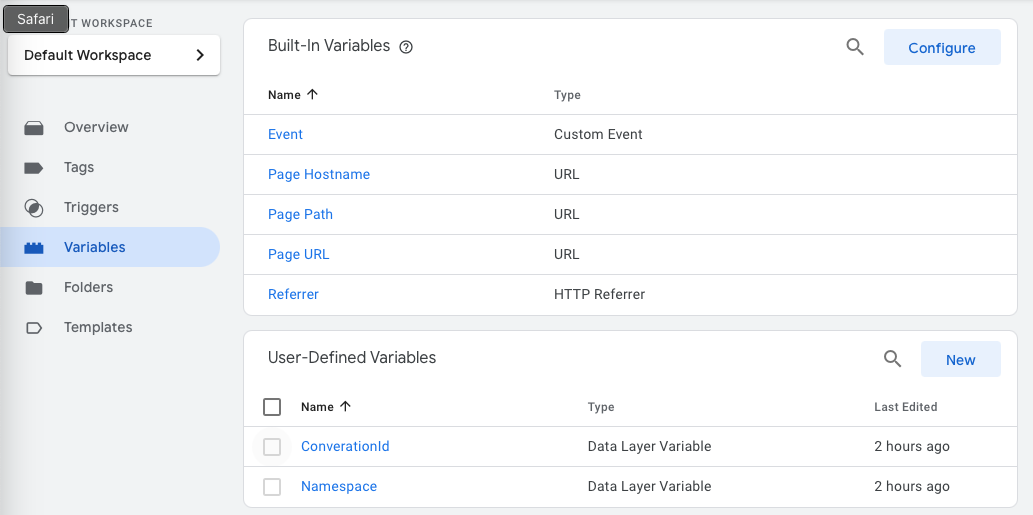
The web chat widget also emits additional data you can capture in GA4:
| Variable name | Description |
|---|---|
namespace | The namespace where the web chat was created |
conversationId | The conversation ID for the events |
To track these, add User-Defined Variables in GTM:
Click New under User-Defined Variables, set the variable type to Data Layer Variable, and set the Data Layer Variable Name to conversationId.
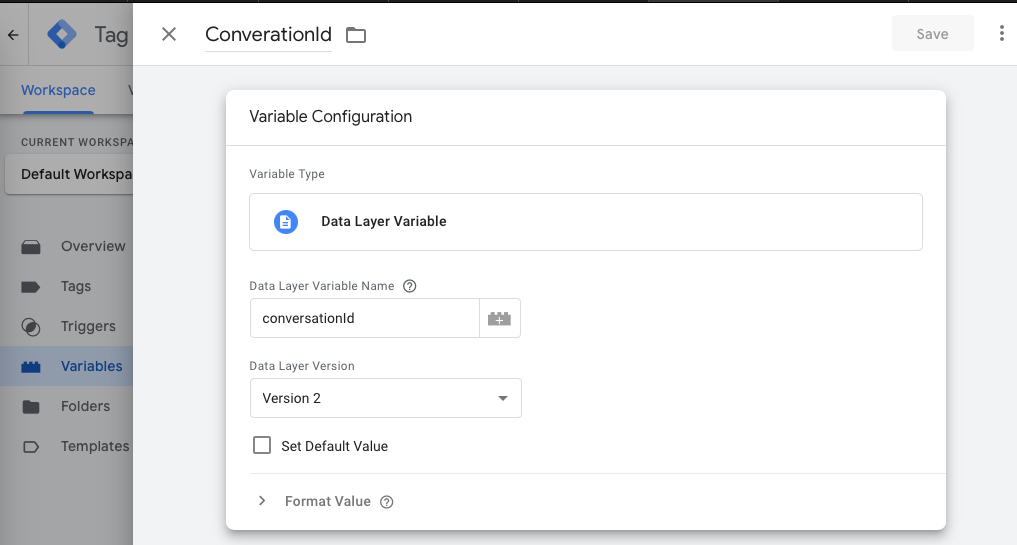
Repeat for any other variables from the table above.
Then open your Widget Event Tag and add the new event parameters:
After publishing, the new fields will appear in your Google Analytics events:

Testing
Google Tag Manager
Click the Preview button at the top of GTM to open the preview screen. Your website will open in a new tab. Interact with the web chat widget and verify events appear in the GTM preview.
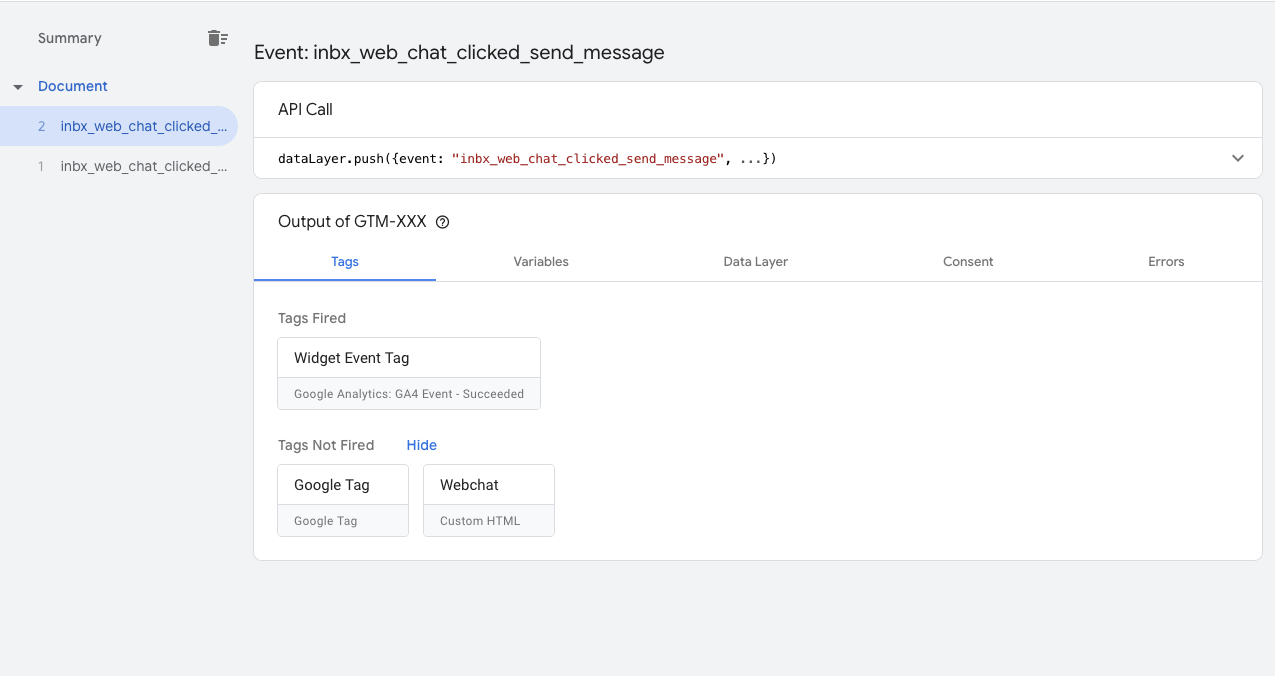
If everything is working correctly, events will show as Succeeded:

Google Analytics
In your Google Analytics dashboard, go to Admin → Data display → DebugView. Interact with the web chat widget on your site and confirm the events appear in real time.
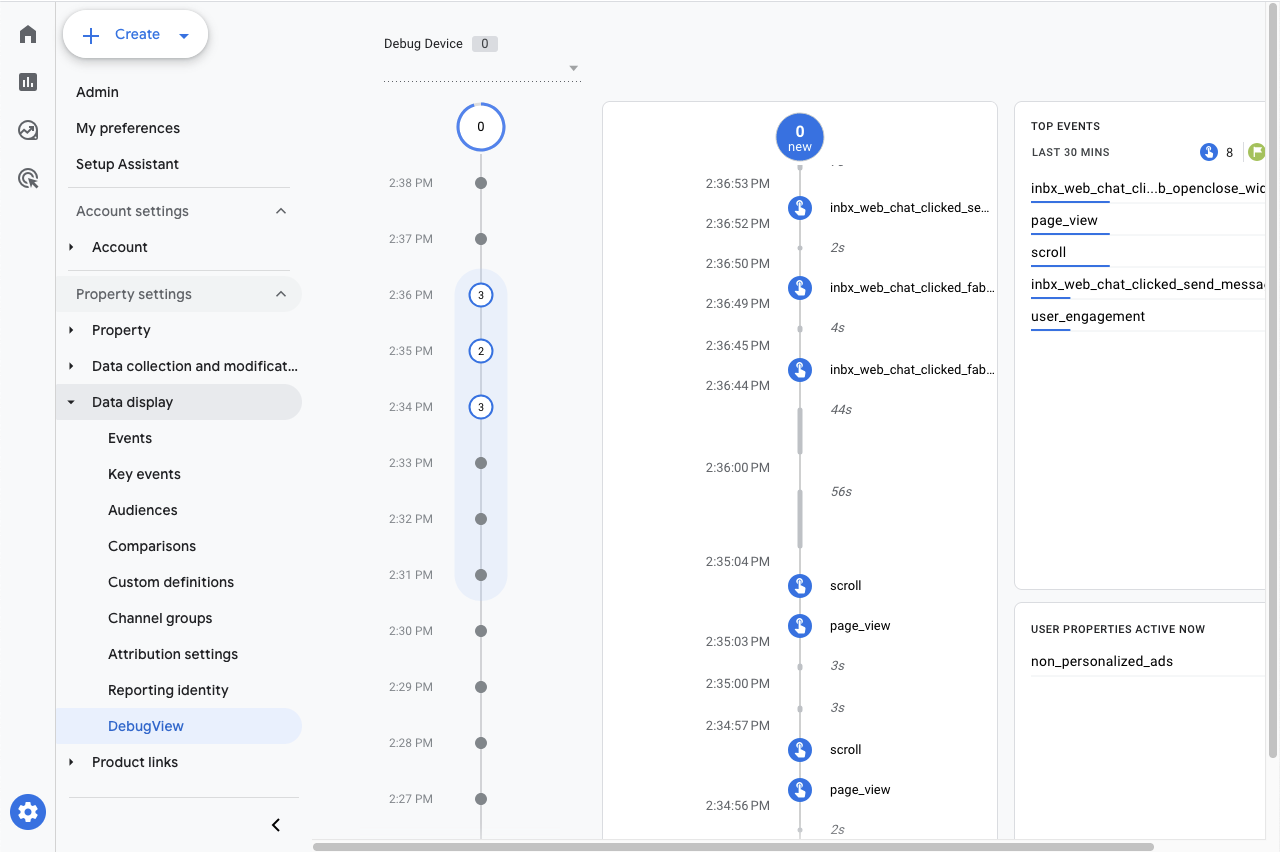
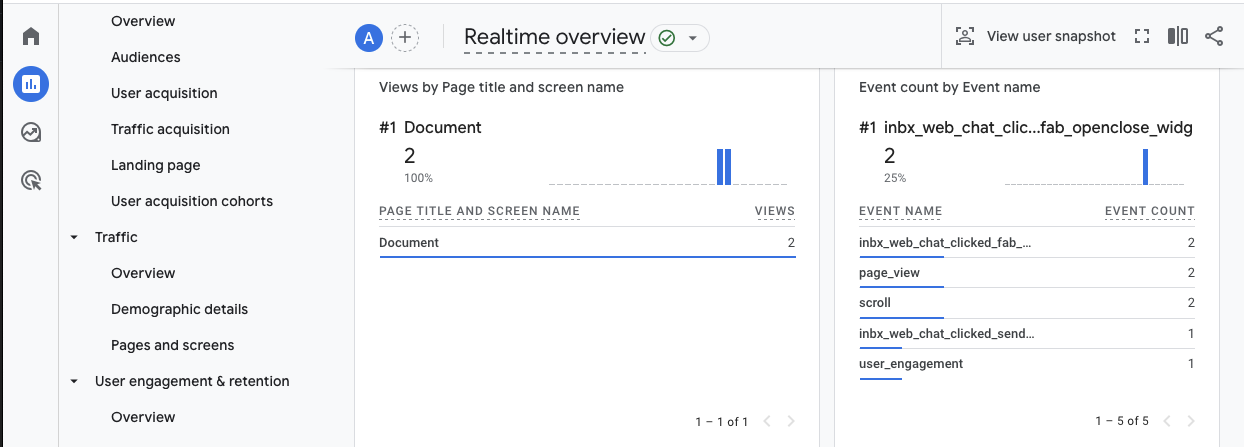
You can also verify in the Realtime overview:
Once confirmed, publish your GTM changes so your live site starts tracking these events.
Copy setup to multiple client accounts
If you manage multiple businesses, you can duplicate your GTM setup using the container export/import feature.
Export your GTM container
- Open your GTM account and select the configured container.
- Go to Admin in the top navigation.
- Under the Container column, select Export Container.
- Choose the latest container version and click Export. Save the
.jsonfile to your computer.
Import to another GTM account
- Open the target GTM account or container.
- Go to Admin → Container → Import Container.
- Choose the
.jsonfile from the export. - Select Existing or New container as appropriate.
- Choose Merge to add items alongside existing ones, then resolve any conflicts.
- Review the Summary screen and click Confirm.
After importing, update the client-specific details:
- Google Analytics Measurement IDs (two locations)
- The web chat widget script
Test in Preview Mode before publishing to the client's live site.
Save each configuration as a GTM version before making changes, so you have a rollback option if needed.