Getting Started with CalendarHero
Accessing CalendarHero
- Create a new Business App user in Partner Center with CalendarHero activated for the account.
- The user logs in to Business App and clicks CalendarHero in the left navigation.
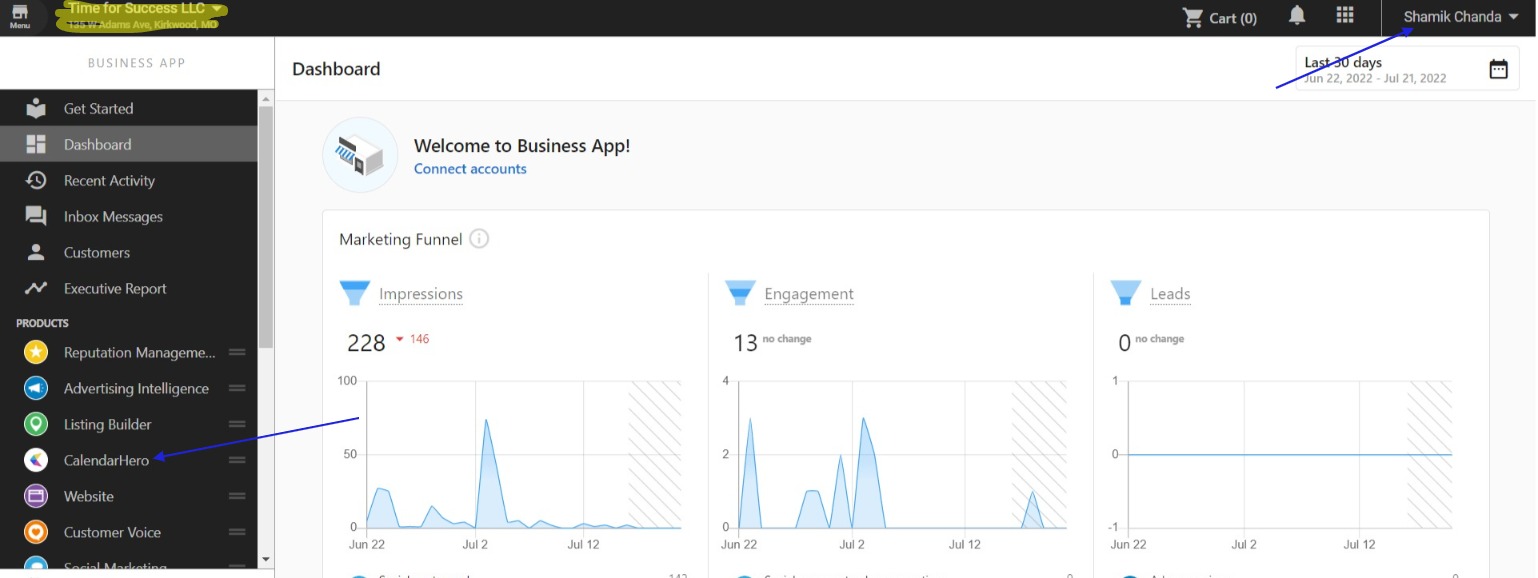
- The user's CalendarHero account is created automatically and they are routed to the dashboard to set up their calendar and meeting links.
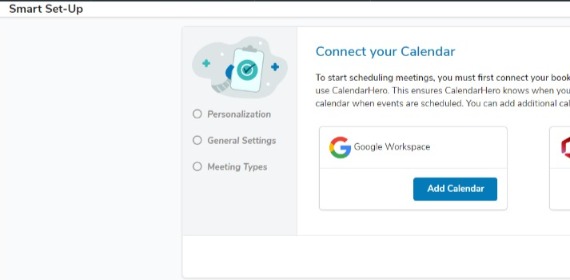
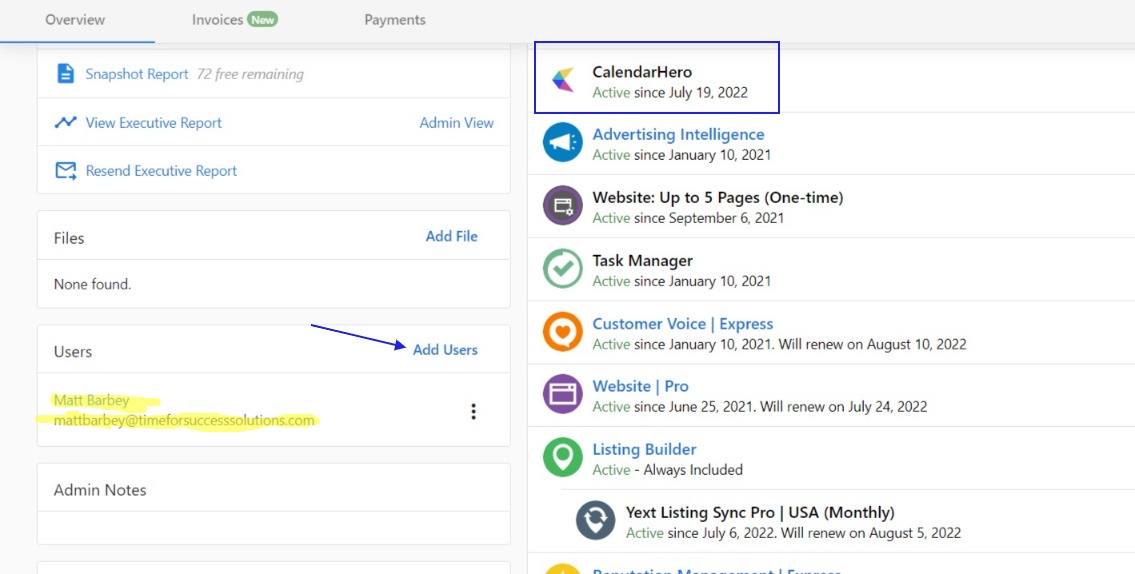
To be a user on more than one CalendarHero account, each account requires a unique user with a different email address.
Activating CalendarHero for all accounts
There are no limits to how many free versions of CalendarHero can be activated for clients.
-
Ensure the product is enabled by clicking Start Selling in Partner Center.
-
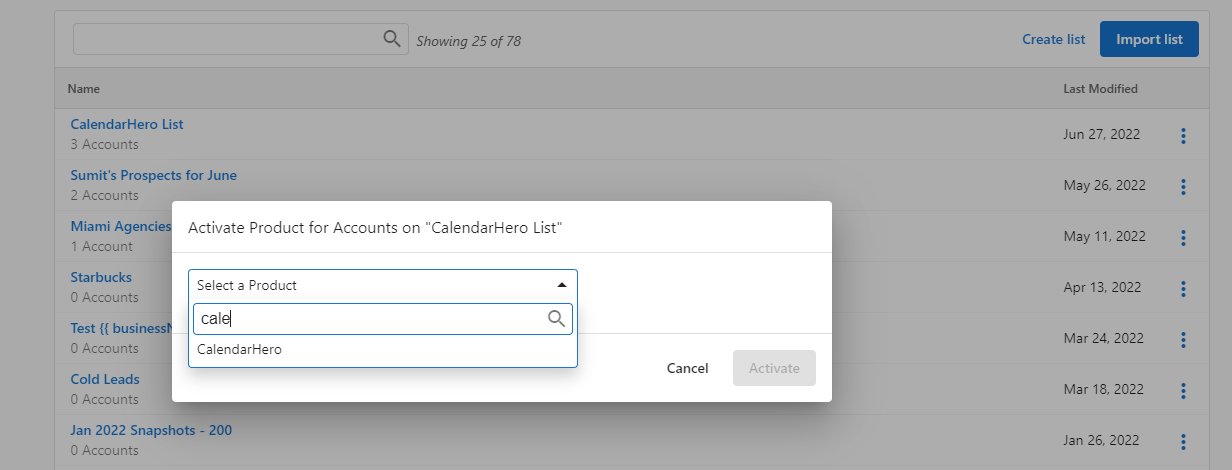
Create a list of all accounts to activate CalendarHero for.
-
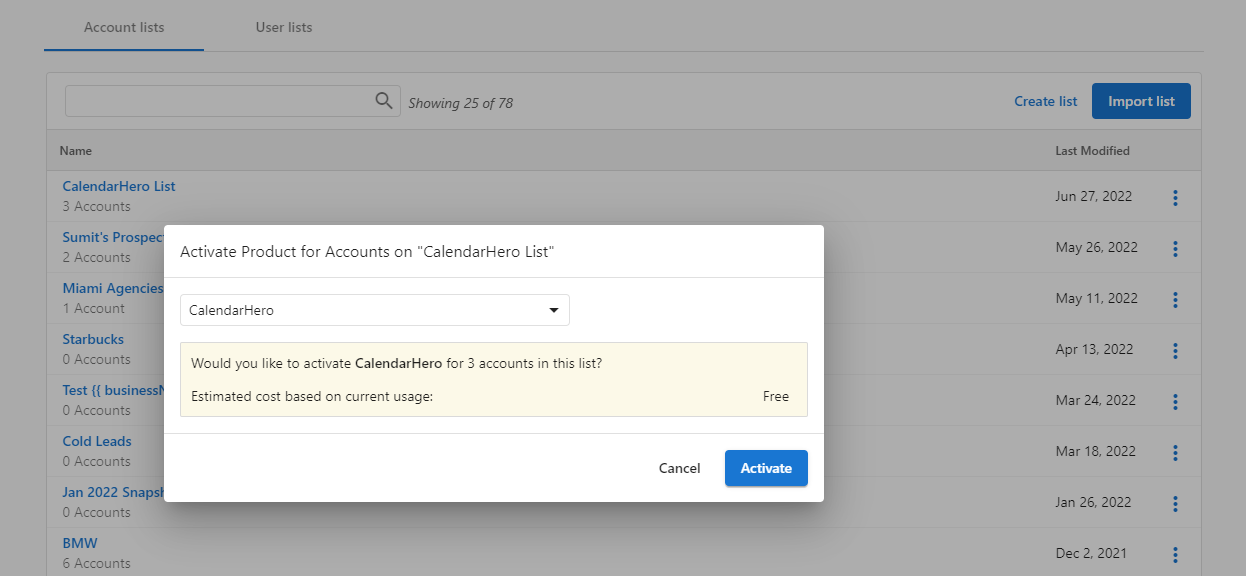
Click the kebab menu next to the list and select Activate Product.
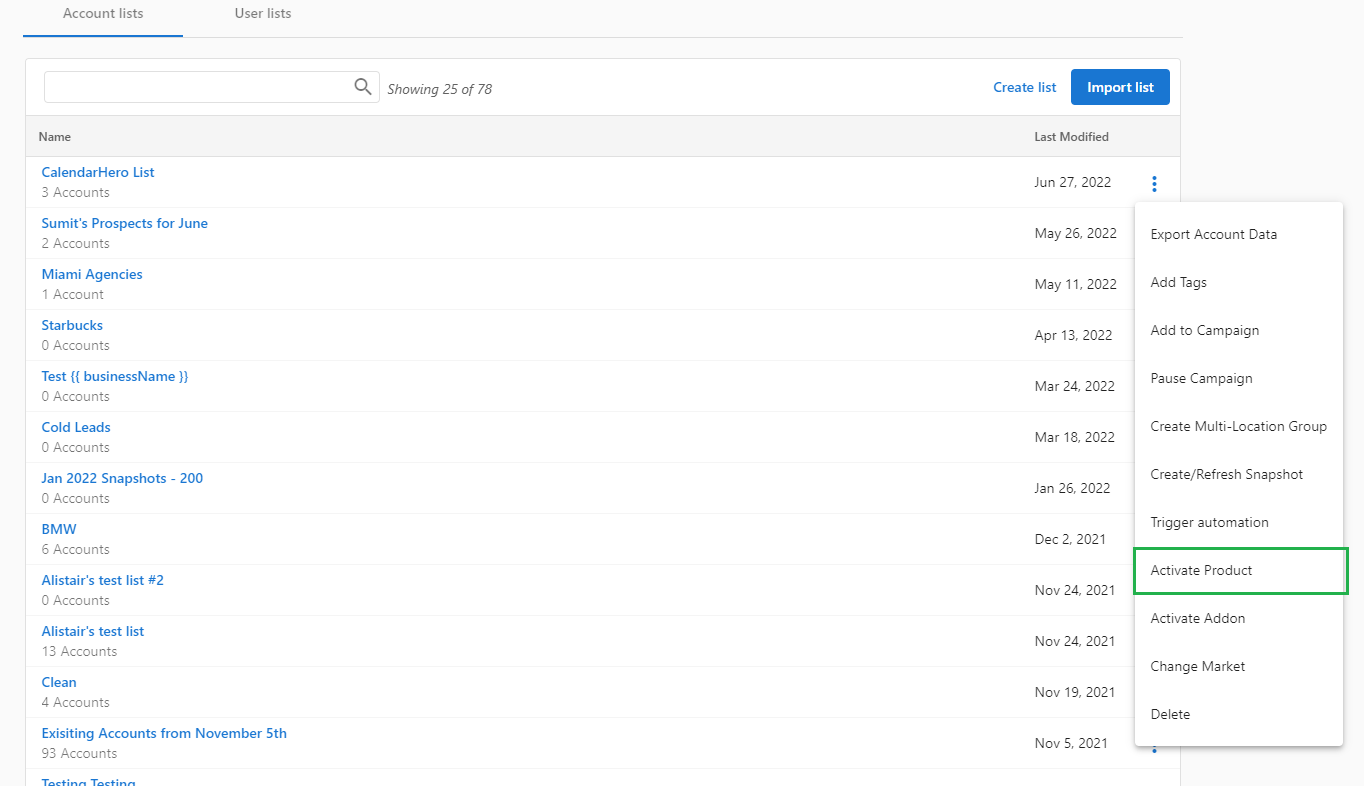
- Search for and select CalendarHero, then click Activate.