How do I connect a domain for marketing email campaigns?
To send marketing email campaigns from your client's domain, add a verification record and an SPF record with the domain's DNS host, then choose the verified domain in the Campaign Settings tab.
If you use or resell marketing email products like Constant Contact, you need to set up these DNS records so the email campaigns sent on behalf of your client's domain work properly.
What DNS settings do I need to connect a domain?
When using marketing email services, you need to verify domain ownership and ensure proper email delivery through DNS settings. The required DNS settings depend on the hosting provider:
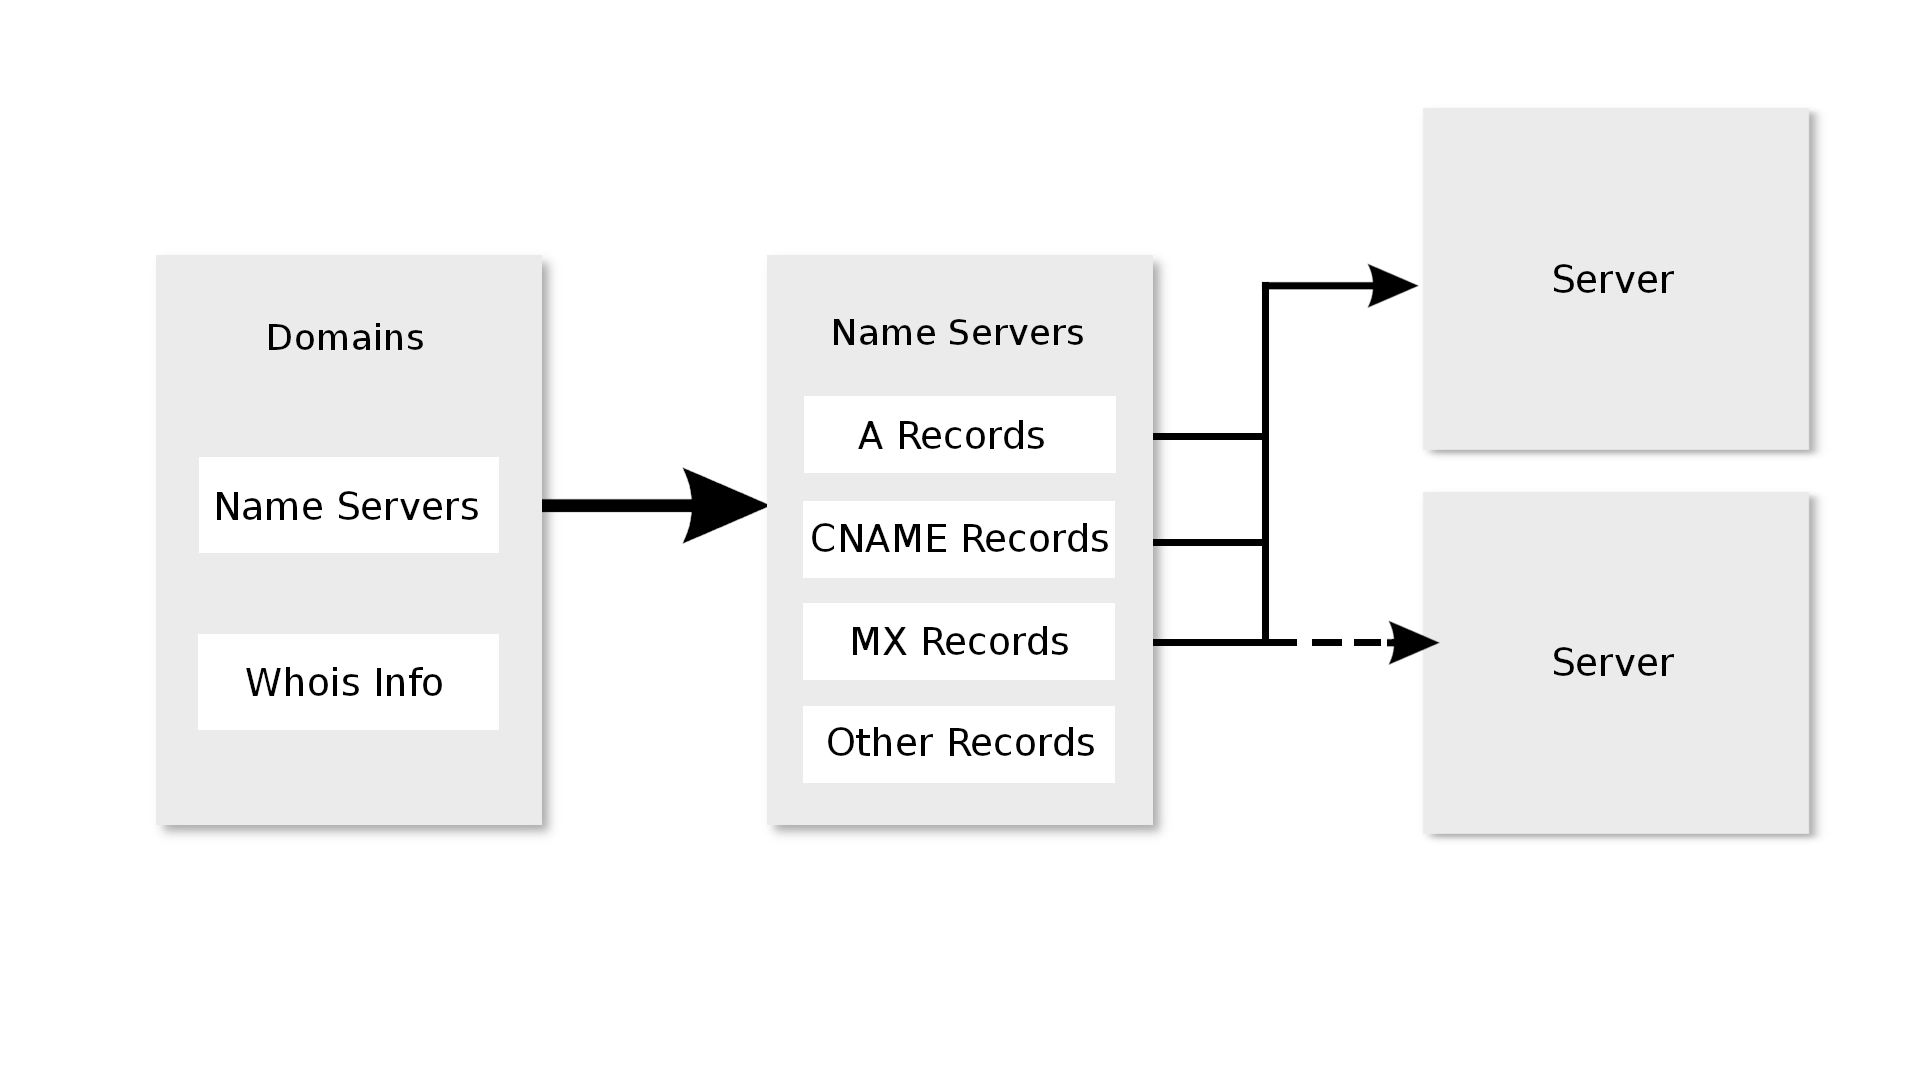
Where is my DNS hosted?
You have several options for where your DNS is hosted:
1. WordPress Hosting (Pro or Premium)
Custom domains are available on WordPress Hosting Pro and Premium plans. WordPress Hosting Standard does not support custom domains, so this option doesn't apply to Standard accounts.
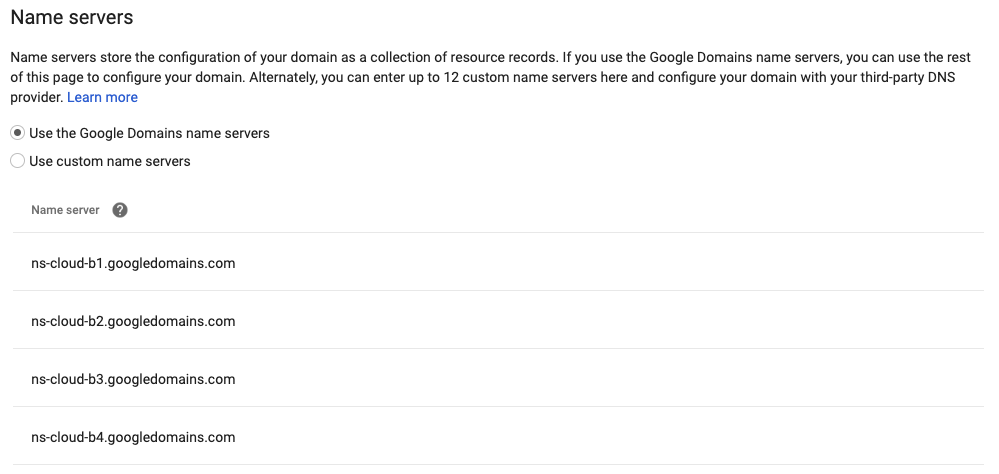
Name servers
If your domain is using WordPress Hosting name servers, you'll have these settings:
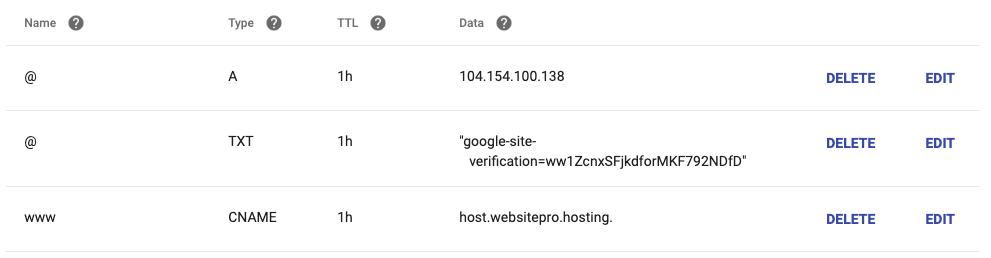
DNS records
You can add the required DNS records in the WordPress Hosting interface:

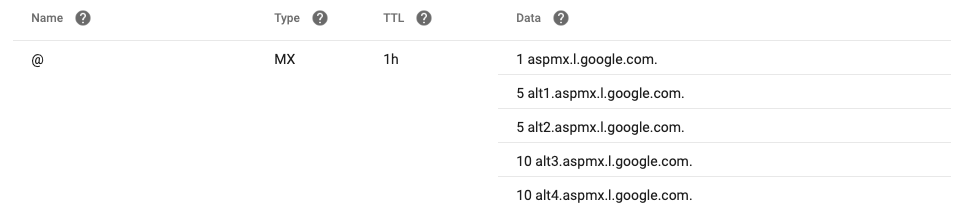
2. Google Workspace
If your domain uses Google Workspace, you'll need to add the MX records in your DNS settings:
3. Other DNS providers
If you're using a different DNS provider, you'll need to add the required records in their interface.
Which DNS records do I need to add?
Verification record
You need to add a verification record to prove domain ownership to the email marketing service:
Campaign settings
After domain verification, you'll need to set up your campaign settings. Navigate to the Campaign Settings tab and follow these steps:
- Visit the
Campaign Settingstab - Select the domain used for sending emails
- Choose the verified domain
- Configure any additional options as needed
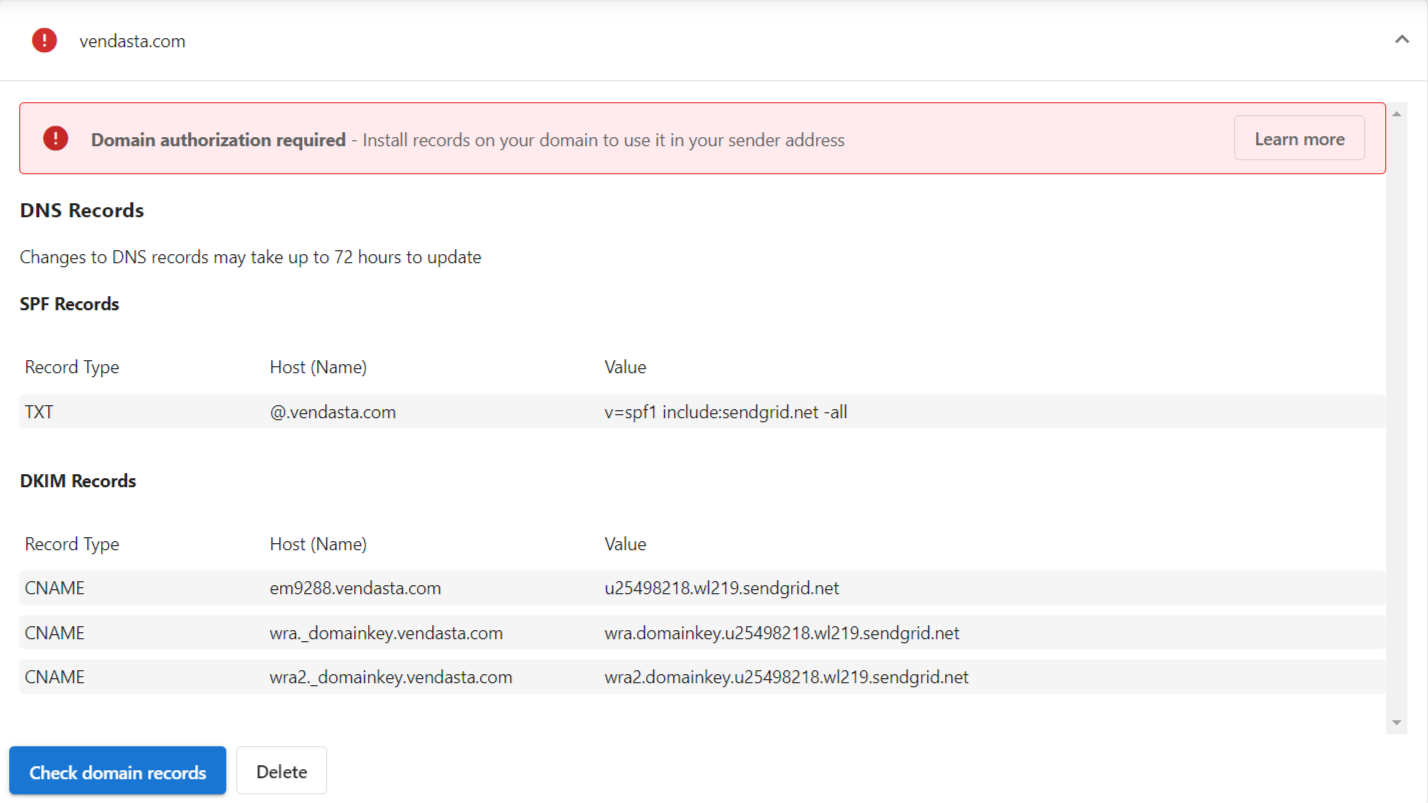
SPF record
The SPF (Sender Policy Framework) record helps prevent email spoofing by specifying which mail servers are authorized to send emails on behalf of your domain.
- Add an SPF record to your domain's DNS settings
- Follow the format provided by your email marketing service
- This helps improve email deliverability and prevents emails from being marked as spam
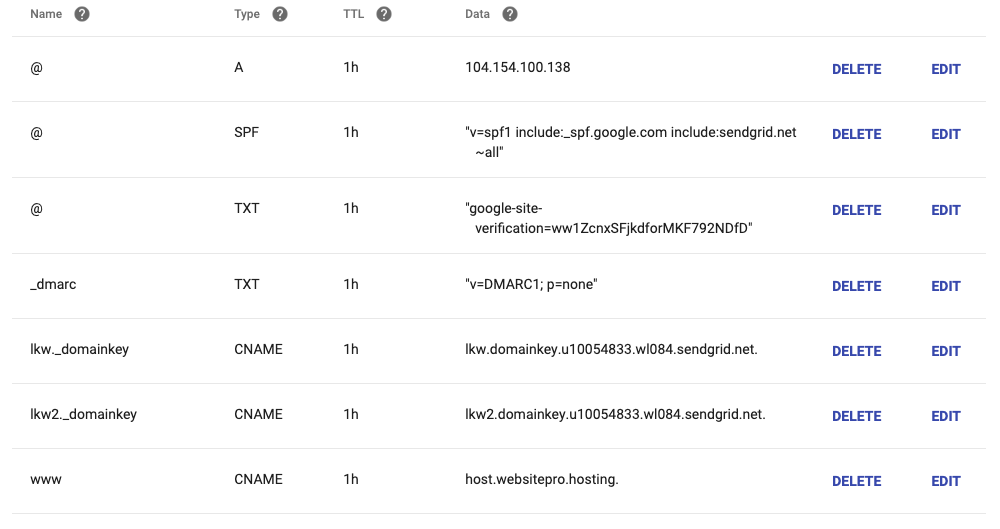
What do I do if my domain doesn't verify?
If you encounter issues with your email marketing setup:
- Verify all DNS records are correctly entered
- Check for typos or formatting errors
- Allow sufficient time for DNS propagation (can take up to 24-48 hours)
- Confirm you have the necessary permissions to modify DNS settings
- Contact your DNS provider or email marketing service for additional assistance
Frequently asked questions
How long does it take for DNS records to verify?
DNS propagation can take up to 24-48 hours. If records still show as missing after that, check them for typos or formatting errors.
Why do I need a verification record?
The verification record proves to the email marketing service that you own the domain. After the domain is verified, you can select it in the Campaign Settings tab.
What does the SPF record do?
The SPF (Sender Policy Framework) record specifies which mail servers are authorized to send email on behalf of your domain. It helps prevent email spoofing, improves deliverability, and keeps emails from being marked as spam.
Can I connect a domain hosted on WordPress Hosting Standard?
No. Custom domains are available on WordPress Hosting Pro and Premium plans only.
Additional resources
- For help with specific DNS providers, consult their documentation
- Check with your email marketing service for up-to-date DNS requirements
- Consider setting up DKIM and DMARC for additional email security